Well I have finally returned from the tropical paradise that is Yuma Az. (Did you sense the sarcasm there? I was laying it on pretty thick.) Have no fear faithful followers new posts are soon to be out. Ever wanted to plant your own herb garden? There really is something special about walking out your door to pull basil and oregano and putting right into whatever you are cooking. It is also alot simpler than you may think. Stay tuned. I'll have it up by weeks end.
PS Happy Birthday to all the Marines out there. SEMPER FI Devils!!!
So you have your homemade pita bread, and you are wondering what to do with it. Well how about a few homemade jams, jellies, or preserves to put on it? Yes, you read that right. In this episode you are going to learn how to make all three. It really is quick and easy. One thing I have learned in this process to become more self sufficient and less dependent on commercial food products is the ease at which these products are actually produced at a family level. So what do you say? Let's get to it.
First lets understand the difference between the three. Jelly, jam and preserves are all made from fruit mixed with sugar and pectin. The difference between them comes in the form that the fruit base takes.
In jelly, the fruit base comes in the form of fruit juice.
In jam, the fruit base comes in the form of fruit pulp or crushed fruit (and is less stiff than jelly as a result).
In preserves, the fruit base comes in the form of chunks in a syrup or a jam.
Pretty simple right? Basically it comes down to how "chunky" you like your jelly or jam.
Now back in your grandma's days when preserving jams and jellies she probably didn't use pectin. Pectin is an indigestible carbohydrate (fiber), meaning it does not provide energy. It is found in the cell walls of most fruit. When heated with sugar in water, it gels, giving jam, jelly and preserves their thickness. Some fruits have more pectin than others. You can cook down all of these without pectin to get the thickness but it removes some flavor in the process. So all of the following recipes use an additional pectin added in during the boiling process. Instead of boiling for 40 minutes to get the thickness desired we will be boiling for 10 minutes. Is it cheating? I don't feel that it is. You can actually produce your own homemade pectin if you wish.
Lets start with the jelly. For my jelly I choose to make something I little out of the norm. Jalapeno jelly. If you have never tried this, I highly recommend making a batch. There is no heat whatsoever. It tastes exactly the same as candied jalapenos. Very sweet, very tasty.
Ingredients:
12 medium jalapenos stemmed and seeded
2 cups cider vinegar
6 cups of sugar
2 3oz pouches of liquid fruit pectin Optional green food coloring
This recipe fills 3 pint or 6 half pint canning jars
Method:
Remove stems from jalapenos, cut open and remove seeds then quarter. Puree peppers in a food processor or blender with 1 cup cider vinegar until completely smooth. Combine puree with remaining vinegar and sugar. Bring to a boil over high heat. Boil 10 minutes, stirring frequently to avoid scorching or burning.
Add all of the liquid pectin at once and stir in well. Continue to hard boil for 1 minute stirring constantly. Then remove from heat and skim foam if you wish.
Fill your sterlized jars and process for 10 min in your hot water bath canner. Just like with all your other canning, check lids after jars have cooled. Any unsealed jars can be put in the fridge and used immediately. Should be good for about a month in the fridge. Sealed jars should be good for about a year, stored in a dark cool dry shelf.
That's it. Piece of cake right? This jelly is best when served on a cracker with a little cream cheese on top. It is also a terrific compliment to meats and poultry as well.
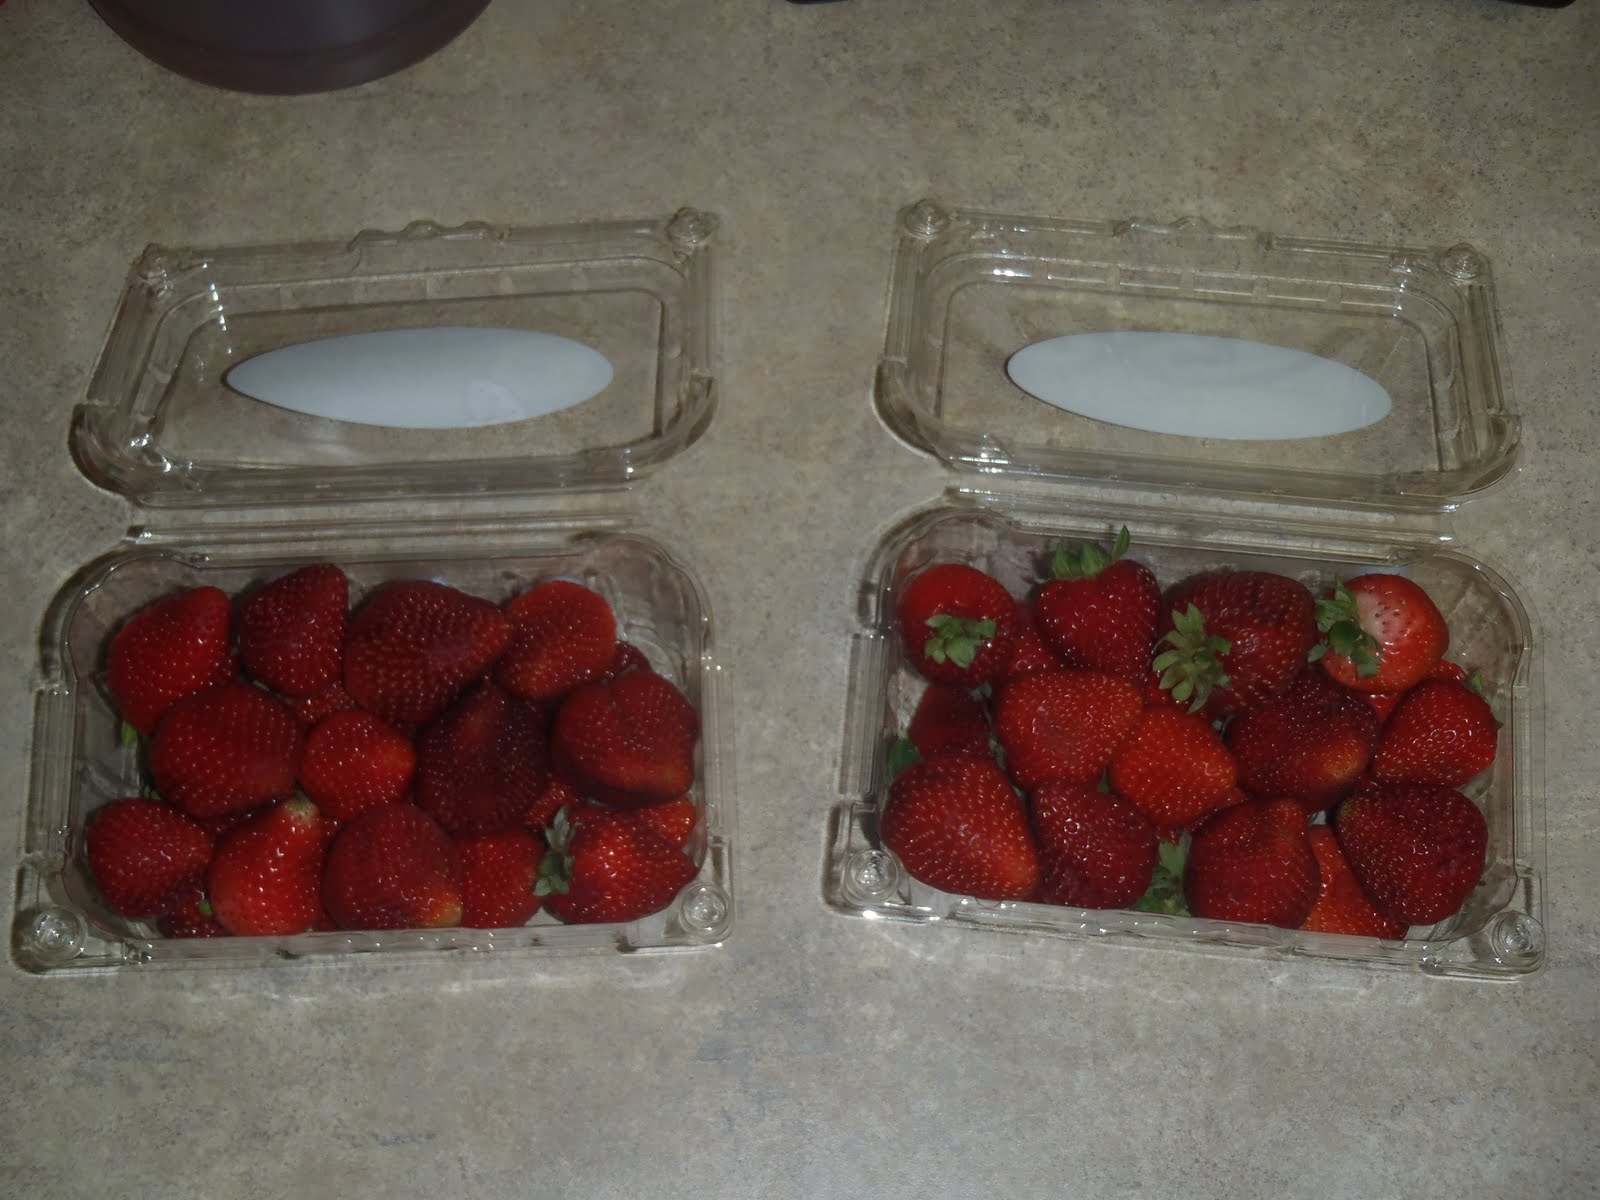
So we got our jelly covered. Lets move on to the jam. I decided to make my favorite jam for this batch. Strawberry.
Ingredients:
32oz of fresh strawberries
3 cups of sugar
3 Tbsp lemon juice
2 .4oz packs of classic pectin
This recipe fills 2 pint or 4 half pint canning jars.
Method:
Remove all stems and leaves from strawberries. Cut out any bruises or soft spots. Mash up the berries with a manual potato masher. Make sure they are good and smashed. It releases all the natural pectin in the fruit and helps with the jelling process as we discussed earlier.
Mix the smashed berries with the pectin and lemon juice and bring to a good boil(one that cannot be stirred away). Boil for 10 minutes.
Now add the sugar and bring back to a boil for 1 minute. Remove from heat and spoon off the foam if you wish.
Fill your sterlized jars and process for 10 minutes in your hot water bath canner. Just like with all your other canning, check lids after jars have cooled. Any unsealed jars can be put in the fridge and used immediately. Should be good for about a month in the fridge. Sealed jars should be good for about a year, stored in a dark cool dry shelf.
Two down one more to go. For my preserve I went with the peach version. Good ripe locally grown peaches cannot be acquired in the winter, so it will be nice to have some preserved during the off season.
Ingredients:
5 medium peaches(I wasn't sure I had enough peaches so I threw in a couple of nectarines)
4 cups of sugar
1 .4oz pack of classic pectin
1/8 cup of lemon juice
This recipe fills 2 pint or 4 half pint canning jars.
Method:
Set a pot of water to boil. Enough to cover a few of the peaches at a time. Fill a bowl on the side with ice water. We need to peel the peaches. The skin does not soften and must be removed for our preserve.
Once the water is boiling put a couple of peaches in for 30 seconds. Remove the peaches with a set of tongs or slotted spoon and immediately place them into the ice water.
If the peaches are ripe the skins will slide right off with little effort. If parts of the skin seem stubborn you can peel the rest with a knife or you can try and reheat them for another 30 to 60 seconds.
Now that the skins are off cut the peaches up in quarters and remove stems and seeds. Cut out any brown spots or mush areas as well. Like with our strawberries mash them up a bit but leave larger chucks this time.
Mix in the lemon juice and stir well to make sure all the surfaces are covered. This prevents the fruit from browning. Add pectin at this time.
Bring peaches to a boil(one that cannot be stirred away). Boil for 10 minutes. Careful when stirring. With the peaches I got burned multiple times by splashing hot fruit. Add sugar and return to a boil for 1 minute.
Fill your sterlized jars and process for 10 minutes in your hot water bath canner. Just like with all your other canning, check lids after jars have cooled. Any unsealed jars can be put in the fridge and used immediately. Should be good for about a month in the fridge. Sealed jars should be good for about a year, stored in a dark cool dry shelf.
Well there you have it. Jelly, jam, and preserves all in an afternoon. We have been enjoying toast every morning ever since I finished these batches. I would love to hear how yours turned out. Leave a comment and let me know. Don't forget to like me on Facebook or Twitter.
So this week faithful readers, you are in for a double treat. The first being this homemade pita bread. I hadn't made this in a while and I cannot tell you why. I could eat this bread with every single meal. It is that good. It really takes no time at all to make either. Most of the time involved is waiting for the dough to rise, which requires no action on your part. We had this the other night with rotisserie chicken. Phenomenal. So without further ado, lets get to it.
Ingredients:
1 package of yeast, or quick rising yeast
1/2 cup warm water
3 cups all purpose flour
1 1/4 teaspoon salt
1 teaspoon granulated sugar
1 cup lukewarm water
Method:
Dissolve your yeast into 1/2 cup of warm water. Add the sugar and stir until dissolved. Let sit for 10-15 minutes until water is frothy.
Combine flour and salt in large bowl.
Make a small depression in the middle of flour and pour yeast water in depression.
Slowly add 1 cup of warm water, and stir with wooden spoon or rubber spatula until elastic.
Place dough on floured surface and knead for 10-15 minutes. When the dough is no longer sticky and is smooth and elastic, it has been successfully kneaded. If you are using a large mixer like a KitchenAid then just hook up the dough hook and need for about 10 min. Here is the KitchenAid I have.
It is a great machine and I highly recommend it. With the proper attachments you can make everything with this. Pasta, bread, grind your own sausage. Its awesome. Sorry, back to the pita bread. =)
Coat large bowl with vegetable oil and place dough in bowl. Turn dough upside down so all of the dough is coated.
Allow to sit in a warm place for about 3 hours, or until it has doubled in size. The right temp for the rise is about 80-85 degrees F. If your house isnt quite that warm you can set the dough infront of a window if the sun is coming through or you can do what I do, preheat the oven for about 1 minute. Then turn the oven off and put the bowl in.
Once the dough has doubled, roll out in a rope, and pinch off 10-12 small pieces. Place balls on floured surface. Let sit covered for 10 minutes. Preheat oven to 500 deg F. and make sure rack is at the very bottom of oven. Be sure to also preheat your baking sheet.
Roll out each ball of dough with a rolling pin into circles. Each should be about 5-6 inches across and 1/4 inch thick.
Bake each circle for 4 minutes until the bread puffs up. I smash the bread down with a spatula and then turn it over and bake for 2 minutes.
Remove each pita from the baking sheet and add additional pitas for baking. I can usually get 2 pitas on my baking sheet at a time.
Immediately place in storage bags or eat warm. Its actually the best way. This is bread so do not leave it out in the open air or it will harden. The Mrs. says they taste a little like saltines when they harden up some.
Warm pitas, man I can't think of many things better. Except for maybe fresh warm pita covered in homemade peach jam. Thats coming in my next post. I told you there was a double treat coming this week. Stay tuned.
Don't forget for a closer view you can click on the pictures. Don't forget to like this page on Facebook or Twitter.
To all my friends on the east coast, looks like you got some weather heading your way. Check out my website and get yourself prepared before its too late. Don't rely on the Feds to take care of you after a disaster. Take responsibility for your family's safety. This one looks like it might be a doozy. Y'all stay safe over there!!
I have all the supplies and a few pointers to help you get through this storm and the rest of the hurricane season. Its not too late. Most of the items listed are next day shipping.
Well I have finally returned from my business trip. I was very anxious to see how my pickles turned out after a week of marinating. The results are in. They taste good. A little vinegary...but not too much. I was hoping the garlic would come through a little more, I could hardly taste it at all. The dill did come through nicely. As for texture, a little softer than I would have liked. I was hoping for a more firm pickle. I have done some reading since the big test and have found multiple suggestions that I am going to try out on the next few batches. I will let you know what works out best in a future post. So stay tuned for that. I did make one jar with some jalapenos for a little added spice and will be taking those to work with me tomorrow to get an outside opinion.
We had a very busy day today with the kids returning to school. All though I did find out later some horror stories out there about some 1st day of school confusion that was down right scary. Children being told to walk home 10 miles. Just absolute horror stories. We had a little of our own confusion but thankfully nothing as bad as that. I think it will all be sorted out by tomorrow. Any of my faithful readers out there have any first day of school stories to share? I would love to hear them, good or bad. Don't forget to like us on FB and leave a comment.
Who would have ever thought me and ol' Aunt Bee would have something in common. Bad pickles. Well we don't know that for sure just yet. My first attempt may come out a blue ribbon winner. At least that's what I am hoping for. It does remain to be seen. I will warn you now, this is my longest blog post to date. I tried to fill it with as much info as I could to help you along. I've included numerous pictures as well. If you are new to my blog you can click on a picture for a larger view.
Every morning I go out to the garden to pull a few weeds and get my watering done before the heat sets in too awful bad. As I mentioned before, the only edible crop that seems to be thriving in my awful soil and the oppressive TX heat has been my cucumbers. Now don't get me wrong, we like cucumbers. We use them in salads, eat them chilled and soaked in water and vinegar. As with anything else though too much of a good thing is still, too much. So I have been wondering what I was going to do with all of the extras I was going to end up with. Intially my plan was to hand some out to the neighbors. Hopefully I am still going to be able to do that but a couple of days ago it hit me. Pickles.
Now I can remember watching that episode of Andy Griffin as a kid and thinking that making pickles must be a long process, and you must have to have just the right spices to produce a good tasting batch. Aunt Bee was a smart gal, and to have her pickles taste like kerosene, then there must be something in the process she was goofing up. As near as I can rememeber I've never had a home canned pickle. My mother may correct me on that, but for the life of me I don't ever remember eating a pickle that wasn't store bought.
So I began to research pickling. Starting with my two favorite books. The first is The Backyard Homestead. A must have reference for anyone that wants to produce their own food. I wasn't too impressed with the actual pickle recipe that was in the book. The process was the old fashioned way, including 6 weeks of salt brining. No good.
So I referenced my second favorite book that my sister got me for my last birthday. Self Sufficiency for the 21st Century. This book is also a must have for anyone with self sustainment in mind. Everything from building your own composting toilet to root cellaring your sweet potatoes. But neither book covered making pickles. They both covered pickling well enough but it just wasn't what I was looking for specifically. So it was off to the interwebs!
I finally settled on a recipe and a method I thought I could handle. And so began my journey into canning things that actually came from my garden. Which I have never attempted before. Knowing some of the basics I knew I would need a canner, and some jars and lids. None of which I had on hand. Off to the store we go. I had a specific canner in mind that I remember my Great Grandma in Onaga KS had and used. I know I had seen them before in passing so I knew they were still out there. I hit the jackpot on the first stop. Wally-world. As much as I truly hate that place, they do carry everything.
Here's my new gear.
I picked up a Canner, 12 Qt sized jars and lids, an extra box of lids(the lids aren't reusable and considering this was my first attempt I figured I had better have a couple extras for screw ups.) I also grabbed a box of canning tools including a jar grabber, a magnet for snagging the lids out of the boiling water and a air bubble dispenser that also seconds as a gauge for headspace in the jar. Now you can run out to Wally-world yourself to grab all this stuff. Or you can pick them up right here, right now.
Now for the jars I bought regular mouth Qt jars. Which I list for you here. There are also wide mouth jars for tomatoes or sauces. Just make sure you note what you are getting so you can get lids to match.
So just just to make sure we are all on the same sheet of music here, the list of the minimum equipment needed.
A Canner - The big pot - You don't specifically have to have the canner pot but whatever you are using cannot be aluminum and has to be big enough to fully submerge your jars.
Jars and lids - Make sure the lids match the mouth of your jars. Quart or Pint depending on how many pickles you are making and how big you want them.
Some sort of tongs to get the boiling hot jars out of the canner.
Equipment that makes things easier.
Funnel for the jars - makes for easier pouring of the pickling solution.
A flat spatula - gets all the air bubbles out prior to sealing
Now for the recipe.
Ingredients
4 full grown cucumbers
6 cups of white distilled vinegar(5% acidity)
6 cups of water(tap is fine)
6 Tblsp of pickling salt(or kosher, not iodized table salt)
3 heads of fresh dill or 3 tsp of dill seed(one for each Qt jar)
3 cloves of garlic(same as above)
Method
Now for the fun part. I will be including a "Things I learned" during some of these instructions. So watch for them.
Take your canning pot and fill with water. Put the cans and lids in the water and bring to a boil. The canner I got was a 21 Qt pot. Thats ALOT of water. It never seemed to reach a what I would call a rolling boil while I was sanitizing my jars.
*THINGS I LEARNED*
Put the lid on the pot. It traps the heat in and brings the water to a a full boil. Unfortunately I didn't learn this until I had to re-process a jar(more on that later)
When your canner is getting close to boiling start your brine. In a large saucepan combine the vinegar, water, and salt and bring to a boil.
*THINGS I LEARNED*
Make sure the canner is on the verge of boiling. I had my brine to the boiling point long before my jars where ready so I had to lower the heat and wait till the jars were ready and then bring the brine back to a boil prior to filling the jars. There is no time limit on sanitizing the jars. Because we are using the hot bath method, as soon as the canner reaches the boiling point you can pull the jars out and fill them.
While you are waiting for the canner to boil you can get your cucumbers, dill, and garlic ready to go.
During my research I read that taking the ends off of the cucumbers helps to make the pickles more crisp. I'm not sure why, but they sounded like they knew what they were talking about so I did it.
Once you have the cucumbers sliced and diced the way you want them and both pots are boiling it's time to fill the jars.
Very carefully remove a jar from the canner and put a clove of garlic and a head of dill in it.
Then begin to pack your cucumbers in. If you cut them too long for the jar just clip a bit off the end. I saved all of my clipped ends and stuffed them into my last jar that didn't have enough spears to fill it up. Make sure you really pack the spears in tightly. It helps to keep them down and not float up in the brine.
Now if you have a funnel, insert it into jar and pour just enough boiling brine to fill the jar 1/2in below the lip. This is called the headspace of the jar and is very important. The proper headspace allows for a good seal and keeps the cucumbers off the lid. Using your air removal tool(flat spatula, bamboo skewer, butter knife) remove all of the air bubbles out of the jar. If your headspace lowers after this process just add a little more brine until the 1/2in is achieved again.
Take a damp cloth or paper towel and wipe the lip of the jar where the lid will sit to clean it. Pull a lid out of the canner(which is still boiling) and place on jar. Put the ring on and tighten down.
*THINGS I LEARNED*
Less is definitely more when tightening lids. I over tightened on the first round and didn't get a good seal and had to re-process a jar. During the second tightening I used the three finger method. Which was actually two fingers and thumb...but that's an argument for another day. The point being, no tighter than you can get with three fingers.
Once all the jars are filled with the lids on and tightened its time for the hot bath. Here's my last jar. Notice the clipped ends and the color of the cucumbers.
After reviewing a couple canning websites I found that the time for the hot bath differed between them. A few I saw said to keep the filled jars in the canner for up to 30 min. A majority of the sites though had the time between 10 and 15 min. So I took the middle. 12 min sounded good to me so that's what I went with. Again use the lid of the canner and watch for over boiling. That lid on method really gets that water hot!
After 12 min has passed it's time to pull out the jars. Carefully remove the jars from the canner and gently set on a dish towel. You may here a hissing sound coming from the lid. This is what you want, but don't worry if they aren't. It's not a requirement for a good seal. Cover the jars with another towel and allow to slowly cool.
Check the lids in about an hour. If you can see it, the lid should be concave a little, and you should not feel any give when you push down on it. Careful the lids are still going to be hot. If the lid has give or if it makes a popping noise as it goes up and down then the jar has not sealed. Wait another 30 min to an hour and check again. If the jar hasn't sealed at this point, there is two options. Re-process the jar or, put it in the fridge and enjoy the pickles within the next 30 days. If you get a good seal the pickles will keep in a cool dark place for about a year.
*THINGS I LEARNED*
Wait that second hour for the jar to seal. One of my jars sealed within the first 20 min during the cooling period. After an hour the other 2 had not. I thought I had over tightened the lids. I decided to try something out. I was going to re-process one of the jars and just consume the other jar within the month. It would give me a good test bed for taste and crispness having the two to compare against each other. I pulled the lid off of one and brought the canner back to boiling with a new lid in to get sterilized and heated up. With the new lid in place and three fingered tightened, the jar was re-processed. Another 12 min in the canner, then pulled out to be cooled. During this process I rechecked the other jar, only to find that it had sealed itself during that second hour. Once again my impatience had got the better of me. Oh well, I can now still compare the two and see how reprocessing will affect the first jar.
Here are my jars cooling off. Notice the color change to a more "pickle color". I was really surprised by this. I thought that color change would only come with the six week salt brining method. I was wrong.
The whole hot water bath can be done away with if you plan on consuming the entire jar within 30 days. Simply add the cucumbers, dill, and garlic to any jar, pour boiling brine over it, cover, and let it cool down to room temperature. Then put your pickles in the fridge and eat within a month.
So there you have it. Pickles in an afternoon, including a shopping trip. Once again I am amazed at the simplicity of producing something that I would have normally just picked up from the store more than likely filled with numerous, unpronounceable preservatives. So do me and Aunt Bee really have bad pickles in common? We don't know yet. The pickles can be consumed 24 hours after being jarred. The recommended time is 2 weeks to allow the brine to fully soak into the cucumbers. I am going on the road next week so I will be doing a taste test next Sunday when I return. You may want to wait to try this recipe until then. If they turn out to taste like they were pickled in kerosene, then I will have saved you a few cucumbers and an afternoon of canning. If they do turn out to be a bad batch maybe the Mrs. and the kids will be just like Andy and Barney, learning to love them to spare my feelings. For some reason, I seriously doubt that though. =)
If you liked the post or found it to be informative don't forget to like it on Facebook. There is a Facebook button at the bottom of the post or one at the top off to the right. If you want to wait to see how they turned out, I don't blame you.
Thought I would share a picture of the melon and some flowers pulled from the garden. I had thought the melon was ripe for picking. I think I was a little anxious. I thought my tried and true method of thumping the melon like I do in the store was sufficient. I was wrong. It turned out to be just ripe enough to be edible but should have stayed on the vine a little longer. I went and did some research and am going to share what I learned so that y'all don't make the same mistake I did.
From almanac.com
When the stem curls and turns brown and the place where the melon touches the ground turns yellow, it's ready. Rap it with your knuckles and listen for a dull, hollow sound.
The curl of the vine seems to be the general consensus of all the sites I read. My only hope now considering it was the only melon on the vine was that maybe it will produce one more before the growing season ends. Here's hoping anyways. Next time I will try no to be so impatient. One of my many flaws.
The flowers are called zinnias and they have done wonderfully in the garden with no signs of heat stress and just getting the same watering I used on the rest of the garden. With an occasional feeding of Miracle-Gro.You can get the seeds here.
Here is the future master gardener collecting his flowers. The flowers were his, from a school project. They were started in class from seeds and then transplanted at home at the end of the school year. I am really impressed by their resiliency and look.
In honor of my 1000th page view today(thank you loyal readers!) I've decided to make today a double post day! So make sure you enjoy the post just below this one as well.
One of the good things about growing a garden in TX is the long growing season. I believe the last frost hit around March here. Which makes people in Montana jealous. The bad thing about growing a garden in TX is the over bearing heat. Which has decimated my tomato plants this year. I even bought a pair of "heat resistant" plants to see how they would do. They actually ended up producing more tomatoes than my non heat resistant plants but the tomatoes are small and there were not very many of them. The plants that seem to do the best in this heat seem to be my cucumbers. They have spread over a quarter of my garden and encroached on some of my other crops.
I underestimated the size those cucumber plants would need. I also put them up against my fence line with the intent of them climbing the fence and saving some space. I tried to train them the best I could. Apparently the plants had other plans growing more the exact opposite direction from the fence. I'm still not sure why.
I also underestimated the size of my watermelon plant. It actually came as a surprise. I had thought all was lost with the sowing of those seeds. At least 6 weeks had gone by after sowing and no signs of sprouts. Finally a single plant out of about 6 seeds planted showed up. The plan was to transplant after the plant had a chance to get a little stronger but as usual, other things always come up and its put off till tomorrow. Well tomorrow ended up being weeks later and by that point I decided to just leave it. It has entirely consumed a 3ft by 12ft space in the back of my garden. Surprisingly it has only produce one melon. But it sure is a beaut.
My soil here is crap as well so I used a method taught to me by a master gardener(my father). Each plant had a hole dug about 8 - 12 inches deep and about 12 inches wide and filled with a good potting soil.
The plants themselves did great before this heat hit. I will be using the method again early next spring. I will be sowing early in the planting season to see if I can get a pre-summer harvest.
I only have one more growing season before I have to replace all the grass I've killed in my backyard to prepare to sell this house and hopefully move on to our small homestead somewhere in KS. If any of you have any tips or tricks to beat this summer heat beating down our gardens leave a comment and let me know.
Thanks again to all of you, my loyal readers. This truly is a labor of love when you know people are returning time and time again to check out and read the posts on the site. Make sure you are clicking the share to Facebook or the Tweet This link at the top of the page and help me in spreading the word about self sustainment practices.